Only released in EOL distros:
Package Summary
sr_control_gui is a graphic application which integrates anything needed by the end-user to control the hand.
- Author: Sacha Aury, Ugo Cupcic / ugo@shadowrobot.com, contact@shadowrobot.com
- License: GPL
- External website: http://www.shadowrobot.com
- Repository: shadow_robot
- Source: bzr bzr+ssh://bazaar.launchpad.net/~shadowrobot/sr-ros-interface/stable
Package Summary
sr_control_gui is a graphic application which integrates anything needed by the end-user to control the hand.
- Author: Sacha Aury, Ugo Cupcic / ugo@shadowrobot.com, contact@shadowrobot.com
- License: GPL
- External website: http://www.shadowrobot.com
- Repository: shadow-robot
- Source: bzr lp:sr-ros-interface/stable
Contents
Overview
The sr_control_gui is a modular GUI which can be used to control the different nodes of the shadow_robot stack. Different plugins are available in this GUI.
The GUI is programmed in Python, using pyqt and yapsy for its plugin architecture.
You need to compile it once to get the dependencies right:
$ rosdep install sr_control_gui
$ rosmake sr_control_gui
You can now start the GUI by running the command:
$ rosrun sr_control_gui sr_control_gui
The plugins depend on different ROS nodes (e.g. to use sliders to control the hand joints, you need the hand ROS node to be started), and are available only when those nodes are started. You can check the status of the different important nodes in the dropdown panel as shown below. You can also start/stop nodes by right clicking on them. 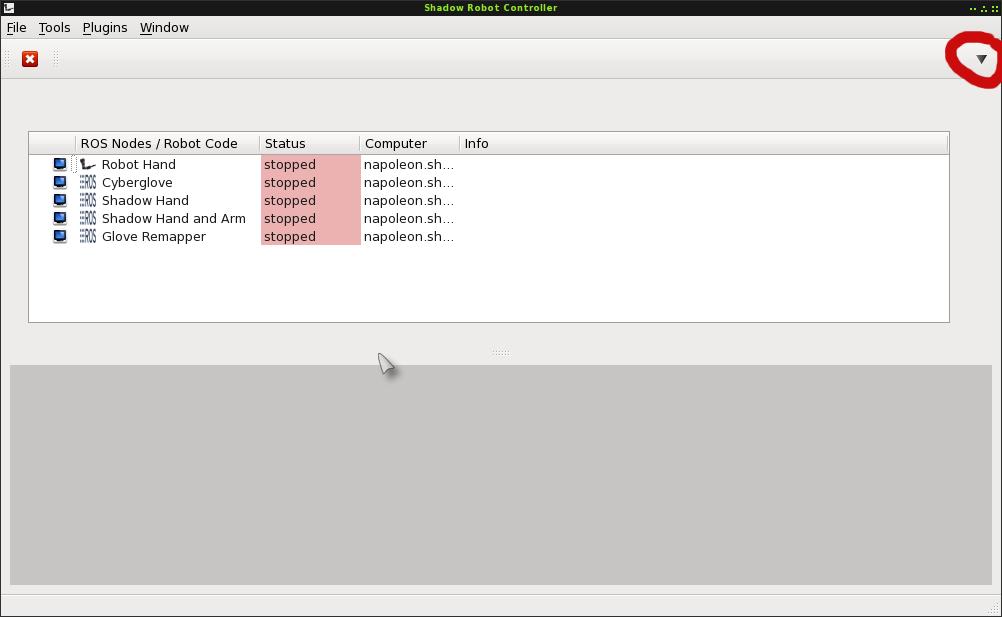
Shadow Hand Plugins
Once the hand node is started you have access to three different plugins for controlling the Hand.
Movement Recorder
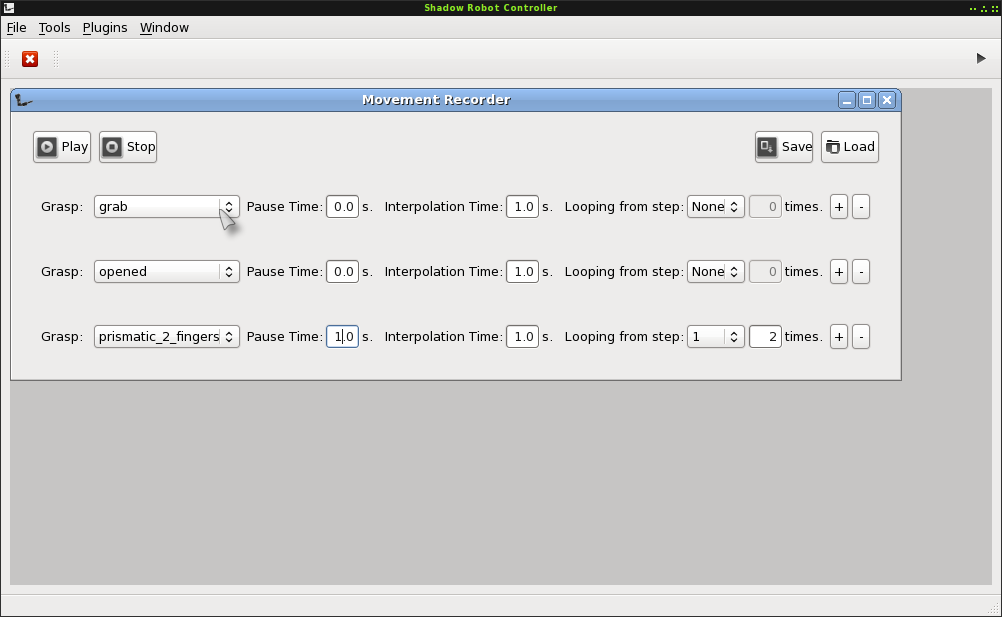
The movement Recorder plugins permits you to record and replay timed movements based on saved grasps. You can save and reload different movements. There's a simple interpolation between two successive grasps, so make sure you don't ask for an impossible movement. You can choose how long you want to pause on a given grasp as well as the interpolation time between the previous grasp and this grasp. You can also loop between different steps of your recorded movement.
To create a new grasp, use the Grasp Controller plugin. It will be added automatically to the grasp dropdown list.
Hand Joint Sliders
Those are simple joint sliders to control each joint independently. You can also control more than one joint at a time, by checking the checkboxes of the joints you want to move, and then using the Move Selected Joints slider. 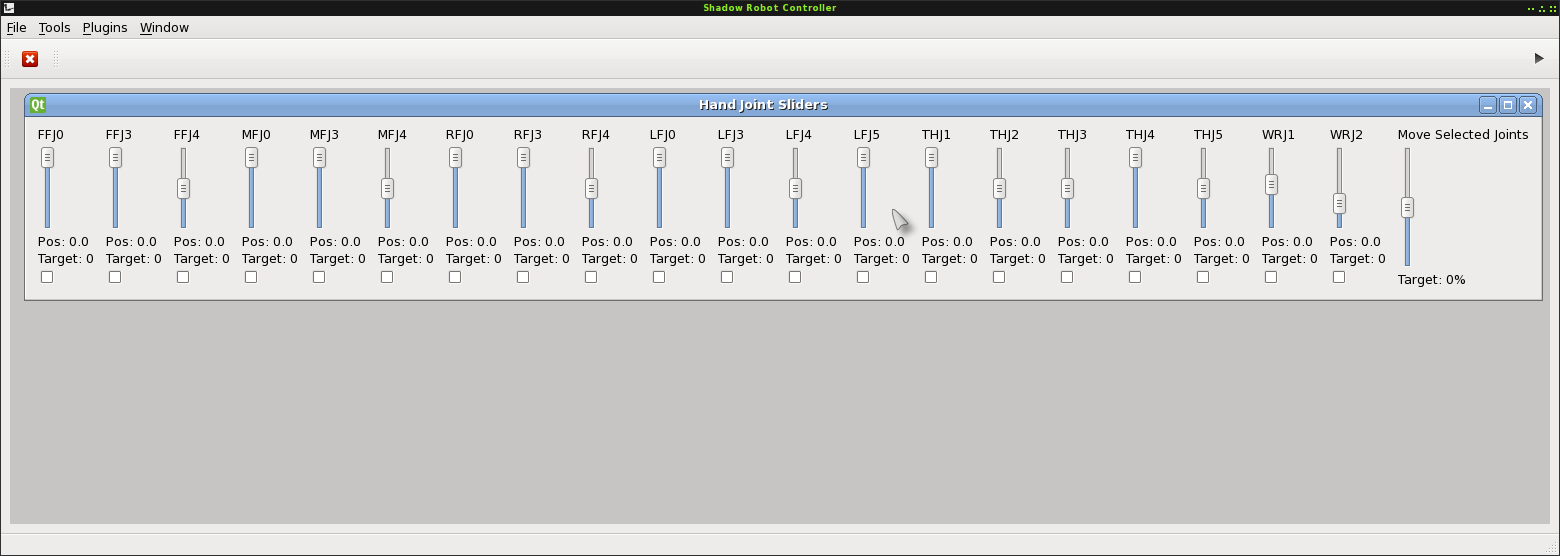
Grasp Controller
You can interpolate between the current grasp, and two different grasps with this slider. Let's have a simple example:
you want to open the Hand, so you double click on the opened grasp in the grasp selector. This directly sets the Hand to this position.
Then you want to grasp a simple object with the ventral grasp, so you select the ventral in the To: grasp selector on the right hand side.
you start grabbing the object with this grasp, however in the middle of this process, you realize that the ventral grasp is not the best grasp for this object. You set the current pose as the reference grasp (by clicking on Set As Reference. You can then set the From: grasp (on the left hand side) to ventral and the To: grasp to lateral for example.
- You can now try both grasp at the same time by either sliding the slider to the right or to the left. This gives you a fine control over your current grasp.
You can also save a current hand pose (obtained either by interpolating between two grasps, or by moving then hand with the sliders) by clicking on the Save button. 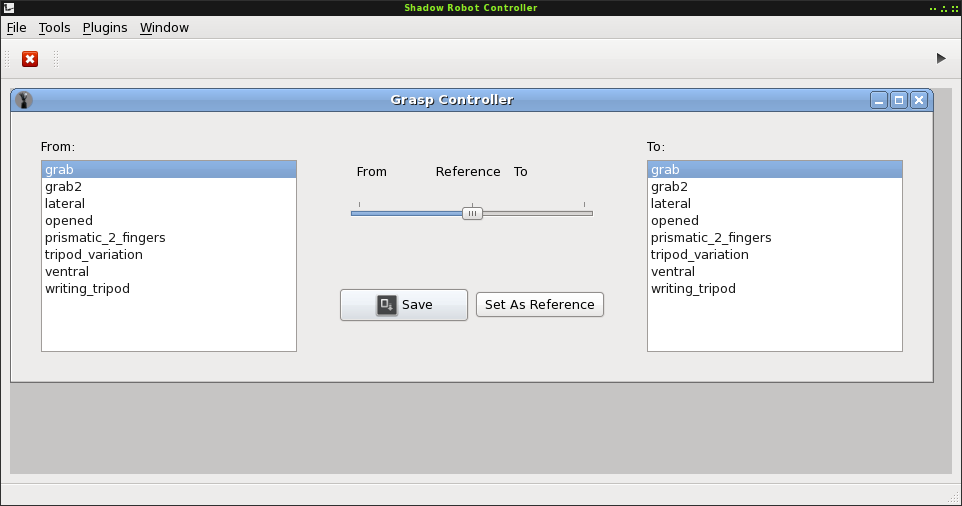
Shadow Arm Plugins
Arm Joint Sliders
Those are simple joint sliders to control each joint independently. You can also control more than one joint at a time, by checking the checkboxes of the joints you want to move, and then using the Move Selected Joints slider. 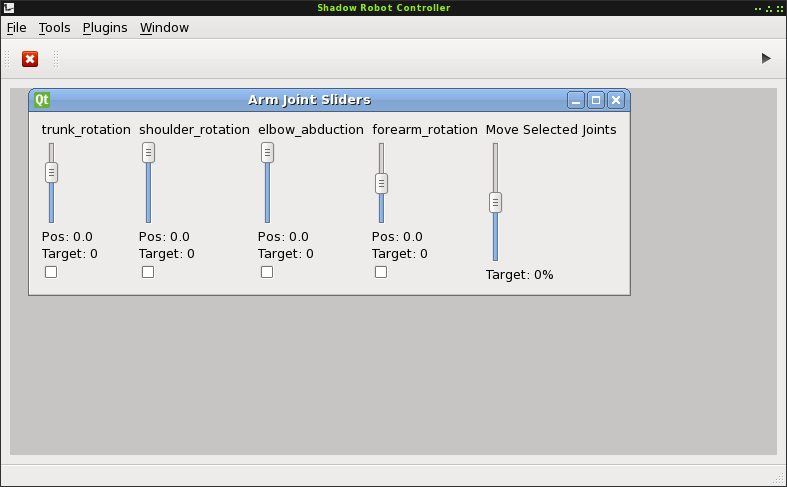
Cyberglove
Cyberglove Calibrator
This plugins will take you through a calibration procedure for the cyberglove. The joints which are calibrated will be shown in green. A picture and a small description of the position to take while wearing the glove are displayed. Once you are in this position click on Calibrate. You have 4 steps containing two substeps each to go through to calibrate the glove. Once all the joints are calibrated, you can Save the configuration. You can also change the current calibration of the glove by pressing the Load button. 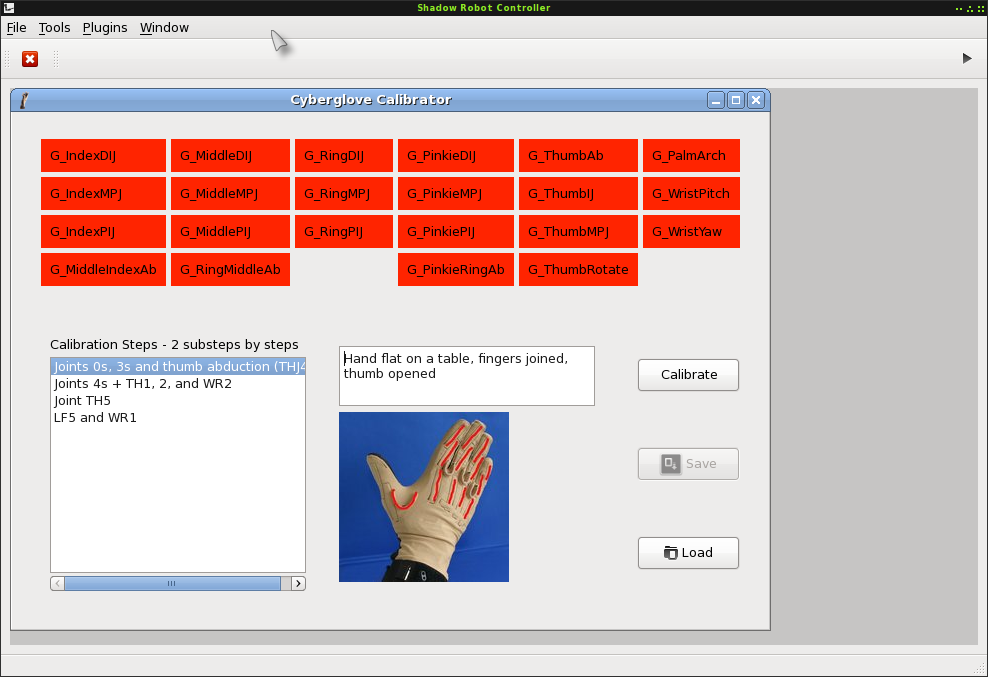
EtherCAT plugins
Change Controllers
Use the change controllers plugins to load different types of controllers. Simply click on one of the controller type, and it will call a service from the pr2_controller_manager to unload the currently running controllers if necessary, and load the ones you selected.

Controller Tuner
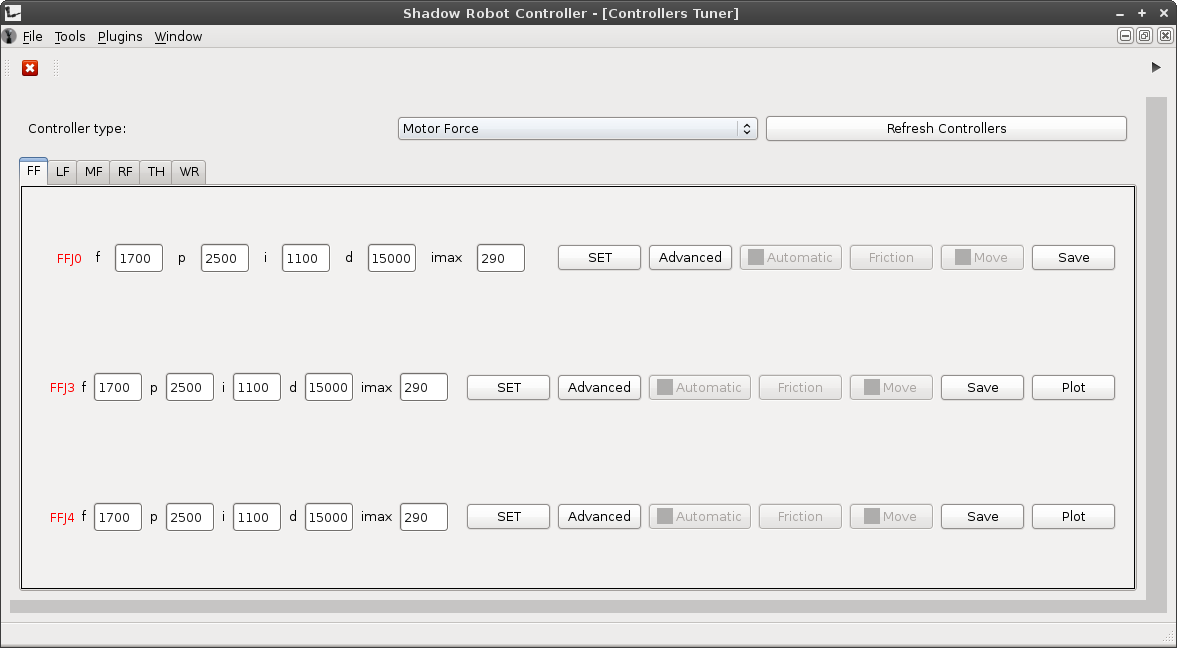
You can select which controller you want to tune with the dropdown menu. You can update the dropdown menu by pressing the Refresh Controllers button (it will check which controllers are currently loaded).
You can modify the different parameters (to see all the different parameters, you can also click on Advanced). To set the new values, press Set. For some controllers, you're able to plot the relevant data and move the joint on a predefined movement.
Once you're happy with one controller, you can press the Save button. This button will ask you for a file, by default, you should save the parameters to the sr_edc_controller_configuration folder.
The Set and Save button are for individual controllers: you need to press this button for each controller you want to save or set.
Motor Resetter
You can reset the zeroing of the strain gauges for the motor. Just select the motors you want to update, and press Reset Motors, this should reset the offset of the strain gauges so that it reads zero when no force is applied to the tendons.
Bootloader
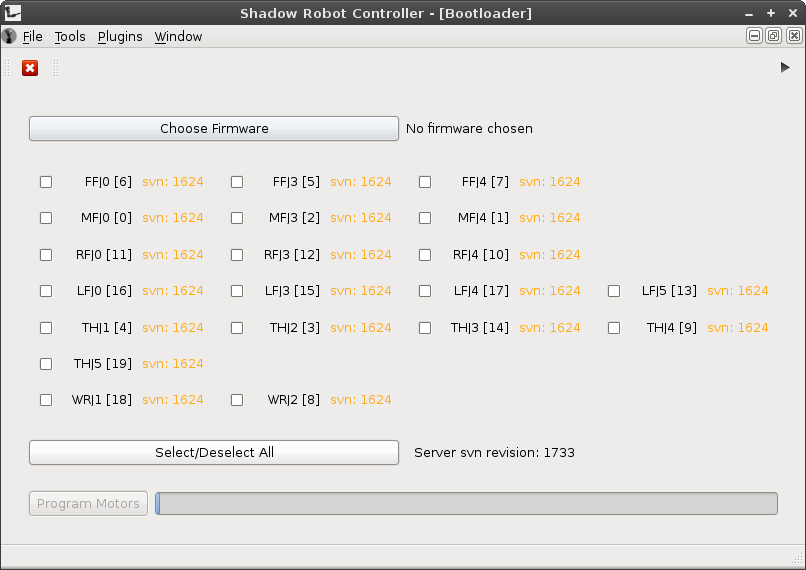
You can bootload the motor firmware using this plugin: just select which firmware you want to flash the motors with (typically the one in sr_external_dependencies/compiled_firmware/released_firmware), then select the motors you want to update, and press Program Motors. This can take a while, so be patient.
EtherCAT Sliders
EtherCAT Sliders is just a set of sliders which send targets to the currently loaded controllers (press Refresh Controllers if you load a different set of controllers). For the position controllers, the ranges are bigger than the actual controller range, so use them with care.
Hand Calibration
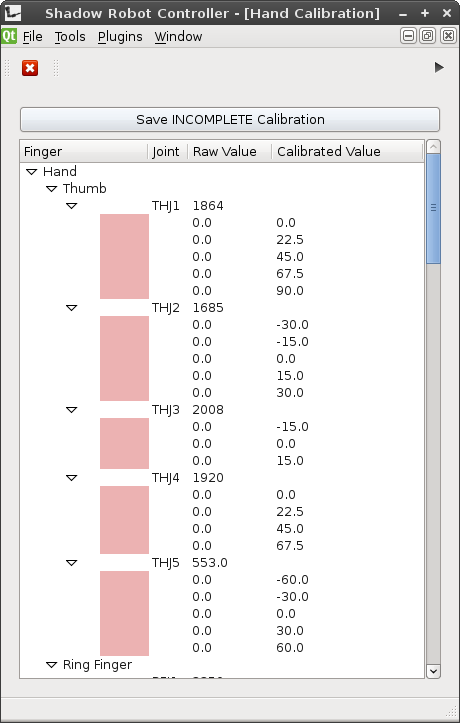
The Hand Calibration plugin should be rather straightforward: put the joint in the correct position using the calibration gigs (you can read the calibrated value in the right column), then double click on the corresponding row. The row should turn green and the raw value should be updated.
To save, just press the Save button, and select the file you want to save the calibration (you should save it to sr_robot_lib/config/calibration.yaml by default). This will update the calibration file, modifying only the newly calibrated joints.
Diamond
- EXPERIMENTAL PLUGIN - Pressing on a button will send a movement of concentric ellipsoids to the selected finger, using the joints 3 and 4.
Circle Scope
- EXPERIMENTAL PLUGIN - This is used to plot a topic against another. It is particularly useful to visualize the Diamond: just select the 2 targets topics (e.g. /sh_ffj3_position_controller/command and /sh_ffj4_position_controller/command), then add a new pair of topics to be plotted, by clicking on the + sign (don't forget to change the color), and plot the 2 position topics (e.g. /joint_states/FFJ3 and /joint_states/FFJ4).
Sensor Scope
NOT WORKING PROPERLY YET This will be probably implemented in a separate package in the near future.
