Setting-up a Robot Simulation (Webots)
Goal: Setup a robot simulation and control it from ROS 2.
Tutorial level: Advanced
Time: 20 minutes
Contents
Background
Several robot simulators can be used with ROS 2, such as Gazebo, Ignition, Webots, etc. Unlike turtlesim, they provide fairly realistic results relying on physics-based models for robots, sensors, actuators and objects. Hence, what you observe in simulation is very close to what you will get when transferring your ROS 2 controllers to a real robot. In this tutorial, you are going to use the Webots robot simulator to set-up and run a very simple ROS 2 simulation scenario.
The webots_ros2 package provides an interface between ROS 2 and Webots.
It includes several sub-packages, but in this tutorial, you are going to use only the webots_ros2_driver sub-package to implement a Python plugin controlling a simulated robot.
Some other sub-packages contain demos with different robots such as the TurtleBot3.
They are documented in the Tutorials page under the Demos section.
Prerequisites
It is recommended to understand basic ROS principles covered in the beginner Tutorials.
In particular, Introducing turtlesim and rqt, Understanding ROS 2 topics, Creating a workspace, Creating your first ROS 2 package and Creating a launch file are useful prerequisites.
Finally, you will need to install webots_ros2_driver from a terminal with this command:
sudo apt update
sudo apt install ros-humble-webots-ros2-driver
# Install webots_ros2_driver and dependencies
cd \dev_ws
pip install rosinstall_generator
rosinstall_generator webots_ros2_driver --deps --exclude-path=C:\dev\ros2_humble > deps.repos
vcs import src < deps.repos

# Build the packages
colcon build

# Source this workspace
call install\local_setup.bat
Note
If you want to install the whole webots_ros2 package, follow these instructions.
Tasks
1 Create the package structure
Let’s organize the code in a custom ROS 2 package.
Create a new package named my_package from the src folder of your ROS 2 workspace.
Change the current directory of your terminal to dev_ws/src and run:
ros2 pkg create --build-type ament_python --node-name my_robot_driver my_package --dependencies rclpy geometry_msgs webots_ros2_driver
The --node-name my_robot_driver option will create a my_robot_driver.py template Python plugin in the my_package subfolder that you will modify later.
The --dependencies rclpy geometry_msgs webots_ros2_driver option specifies the packages needed by the my_robot_driver.py plugin in the package.xml file.
Let’s add a launch and a worlds folder inside the my_package folder.
cd my_package
mkdir launch
mkdir worlds
You should end up with the following folder structure:
src/
└── my_package/
    ├── launch/
    ├── my_package/
    │   ├── __init__.py
    │   └── my_robot_driver.py
    ├── resource/
    │   └── my_package
    ├── test/
    │   ├── test_copyright.py
    │   ├── test_flake8.py
    │   └── test_pep257.py
    ├── worlds/
    ├── package.xml
    ├── setup.cfg
    └── setup.py
2 Setup the simulation world
You will need a world file containing a robot to launch your simulation.
Download this world file and move it inside my_package/worlds/.
This is actually a fairly simple text file you can visualize in a text editor.
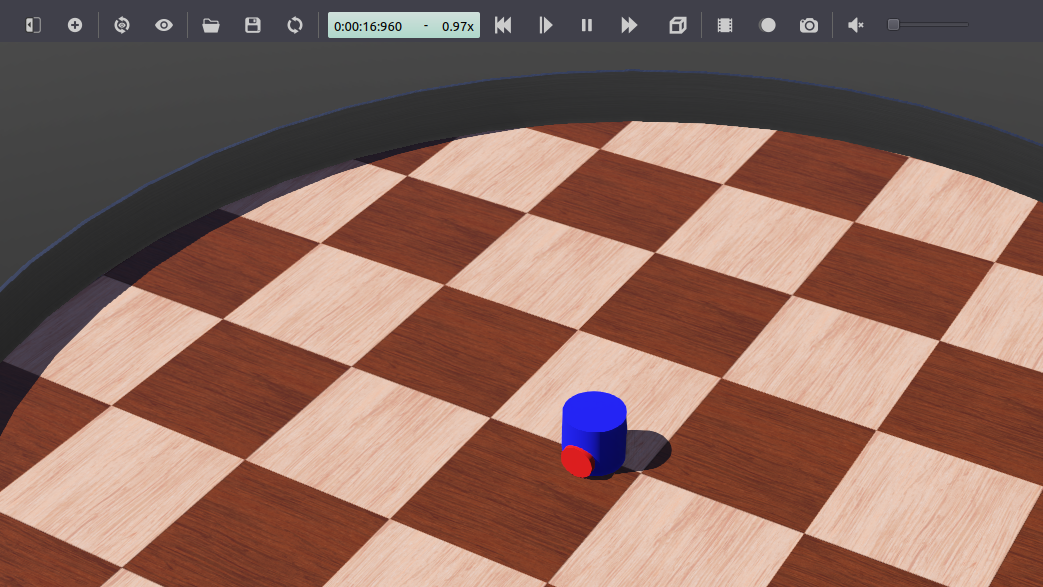
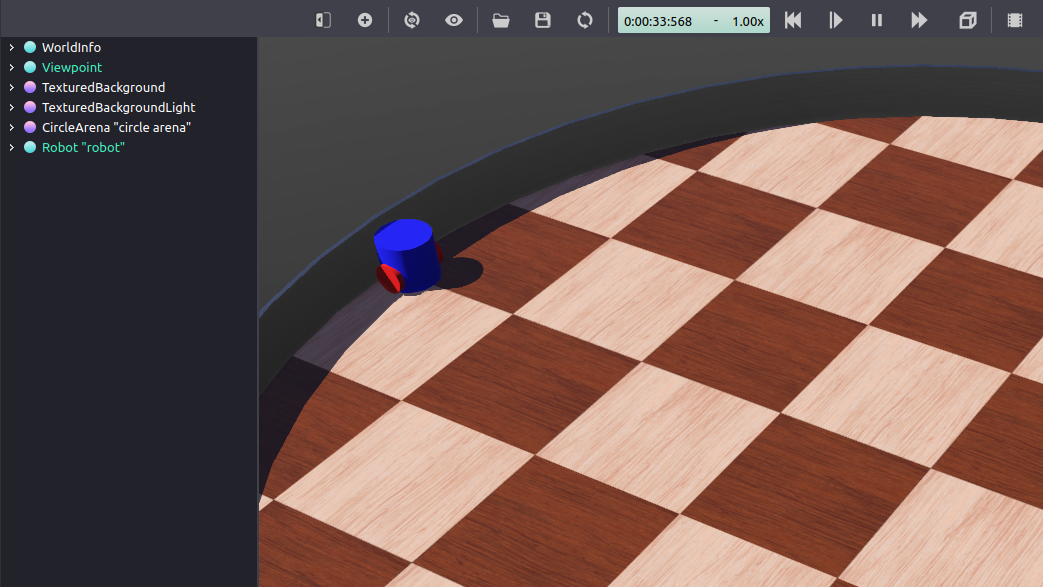
A simple robot is already included in this my_world.wbt world file.
Note
In case you want to learn how to create your own robot model in Webots, you can check this tutorial.
3 Change the my_robot_driver.py file
The webots_ros2_driver sub-package automatically creates a ROS 2 interface for most sensors.
In this task, you will extend this interface by changing the my_robot_driver.py file.
Note
The purpose of this tutorial is to show a basic example with a minimum number of dependencies.
However, you could avoid the use of this Python plugin by using another webots_ros2 sub-package named webots_ros2_control, introducing a new dependency.
This other sub-package creates an interface with the ros2_control package that facilitates the control of a differential wheeled robot.
Open my_package/my_package/my_robot_driver.py in your favorite editor and replace its contents with the following:
import rclpy
from geometry_msgs.msg import Twist

HALF_DISTANCE_BETWEEN_WHEELS = 0.045
WHEEL_RADIUS = 0.025

class MyRobotDriver:
    def init(self, webots_node, properties):
        self.__robot = webots_node.robot

        self.__left_motor = self.__robot.getDevice('left wheel motor')
        self.__right_motor = self.__robot.getDevice('right wheel motor')

        self.__left_motor.setPosition(float('inf'))
        self.__left_motor.setVelocity(0)

        self.__right_motor.setPosition(float('inf'))
        self.__right_motor.setVelocity(0)

        self.__target_twist = Twist()

        rclpy.init(args=None)
        self.__node = rclpy.create_node('my_robot_driver')
        self.__node.create_subscription(Twist, 'cmd_vel', self.__cmd_vel_callback, 1)

    def __cmd_vel_callback(self, twist):
        self.__target_twist = twist

    def step(self):
        rclpy.spin_once(self.__node, timeout_sec=0)

        forward_speed = self.__target_twist.linear.x
        angular_speed = self.__target_twist.angular.z

        command_motor_left = (forward_speed - angular_speed * HALF_DISTANCE_BETWEEN_WHEELS) / WHEEL_RADIUS
        command_motor_right = (forward_speed + angular_speed * HALF_DISTANCE_BETWEEN_WHEELS) / WHEEL_RADIUS

        self.__left_motor.setVelocity(command_motor_left)
        self.__right_motor.setVelocity(command_motor_right)
As you can see, the MyRobotDriver class implements three methods.
The first method, named init(self, ...), is actually the ROS node counterpart of the Python __init__(self, ...) constructor.
It first gets the robot instance from the simulation (which can be used to access the Webots robot API).
Then, it gets the two motor instances and initializes them with a target position and a target velocity.
Finally a ROS node is created and a callback method is registered for a ROS topic named /cmd_vel that will handle Twist messages.
def init(self, webots_node, properties):
    self.__robot = webots_node.robot

    self.__left_motor = self.__robot.getDevice('left wheel motor')
    self.__right_motor = self.__robot.getDevice('right wheel motor')

    self.__left_motor.setPosition(float('inf'))
    self.__left_motor.setVelocity(0)

    self.__right_motor.setPosition(float('inf'))
    self.__right_motor.setVelocity(0)

    self.__target_twist = Twist()

    rclpy.init(args=None)
    self.__node = rclpy.create_node('my_robot_driver')
    self.__node.create_subscription(Twist, 'cmd_vel', self.__cmd_vel_callback, 1)
Then comes the implementation of the __cmd_vel_callback(self, twist) callback private method that will be called for each Twist message received on the /cmd_vel topic and will save it in the self.__target_twist member variable.
def __cmd_vel_callback(self, twist):
    self.__target_twist = twist
Finally, the step(self) method is called at every time step of the simulation.
The call to rclpy.spin_once() is needed to keep the ROS node running smoothly.
At each time step, the method will retrieve the desired forward_speed and angular_speed from self.__target_twist.
As the motors are controlled with angular velocities, the method will then convert the forward_speed and angular_speed into individual commands for each wheel.
This conversion depends on the structure of the robot, more specifically on the radius of the wheel and the distance between them.
def step(self):
    rclpy.spin_once(self.__node, timeout_sec=0)

    forward_speed = self.__target_twist.linear.x
    angular_speed = self.__target_twist.angular.z

    command_motor_left = (forward_speed - angular_speed * HALF_DISTANCE_BETWEEN_WHEELS) / WHEEL_RADIUS
    command_motor_right = (forward_speed + angular_speed * HALF_DISTANCE_BETWEEN_WHEELS) / WHEEL_RADIUS

    self.__left_motor.setVelocity(command_motor_left)
    self.__right_motor.setVelocity(command_motor_right)
4 Create the my_robot.urdf file
You now have to create a URDF file to declare the my_robot_driver.py Python plugin.
This will allow the webots_ros2_driver ROS node to launch the plugin.
In the my_package/resource folder create a text file named my_robot.urdf with this contents:
<?xml version="1.0" ?>
<robot name="My robot">
    <webots>
        <plugin type="my_package.my_robot_driver.MyRobotDriver" />
    </webots>
</robot>
Note
This simple URDF file doesn’t contain any link or joint information about the robot as it is not needed in this tutorial. However, URDF files usually contain much more information as explained in the URDF Tutorials.
5 Create the launch file
Let’s create now the launch file to easily launch the simulation and the ROS controller with a single command.
In the my_package/launch folder create a new text file named robot_launch.py with this code:
import os
import pathlib
import launch
from launch_ros.actions import Node
from launch import LaunchDescription
from ament_index_python.packages import get_package_share_directory
from webots_ros2_driver.webots_launcher import WebotsLauncher


def generate_launch_description():
    package_dir = get_package_share_directory('my_package')
    robot_description = pathlib.Path(os.path.join(package_dir, 'resource', 'my_robot.urdf')).read_text()

    webots = WebotsLauncher(
        world=os.path.join(package_dir, 'worlds', 'my_world.wbt')
    )

    my_robot_driver = Node(
        package='webots_ros2_driver',
        executable='driver',
        output='screen',
        parameters=[
            {'robot_description': robot_description},
        ]
    )

    return LaunchDescription([
        webots,
        my_robot_driver,
        launch.actions.RegisterEventHandler(
            event_handler=launch.event_handlers.OnProcessExit(
                target_action=webots,
                on_exit=[launch.actions.EmitEvent(event=launch.events.Shutdown())],
            )
        )
    ])
The WebotsLauncher object is a custom action that allows you to start a Webots simulation instance.
You have to specify in the constructor which world file the simulator will open.
webots = WebotsLauncher(
    world=os.path.join(package_dir, 'worlds', 'my_world.wbt')
)
Then, the ROS node interacting with the simulated robot is created.
This node, named driver, is located in the webots_ros2_driver package.
The node will be able to communicate with the simulated robot by using a custom protocol based on IPC and shared memory.
In your case, you need to run a single instance of this node, because you have a single robot in the simulation.
But if you had more robots in the simulation, you would have to run one instance of this node per robot.
The robot_description parameter holds the contents of the URDF file which refers to the my_robot_driver.py Python plugin.
my_robot_driver = Node(
    package='webots_ros2_driver',
    executable='driver',
    output='screen',
    parameters=[
        {'robot_description': robot_description},
    ]
)
After that, the two nodes are set to be launched in the LaunchDescription constructor:
return LaunchDescription([
    webots,
    my_robot_driver,
Finally, an optional part is added in order to shutdown all the nodes once Webots terminates (e.g., when it gets closed from the graphical user interface).
launch.actions.RegisterEventHandler(
    event_handler=launch.event_handlers.OnProcessExit(
        target_action=webots,
        on_exit=[launch.actions.EmitEvent(event=launch.events.Shutdown())],
    )
)
6 Modify the setup.py file
Finally, before you can start the launch file, you have to modify the setup.py file to include the extra files you added.
Open my_package/setup.py and replace its contents with:
from setuptools import setup

package_name = 'my_package'
data_files = []
data_files.append(('share/ament_index/resource_index/packages', ['resource/' + package_name]))
data_files.append(('share/' + package_name + '/launch', ['launch/robot_launch.py']))
data_files.append(('share/' + package_name + '/worlds', ['worlds/my_world.wbt']))
data_files.append(('share/' + package_name + '/resource', ['resource/my_robot.urdf']))
data_files.append(('share/' + package_name, ['package.xml']))

setup(
    name=package_name,
    version='0.0.0',
    packages=[package_name],
    data_files=data_files,
    install_requires=['setuptools'],
    zip_safe=True,
    maintainer='user',
    maintainer_email='user.name@mail.com',
    description='TODO: Package description',
    license='TODO: License declaration',
    tests_require=['pytest'],
    entry_points={
        'console_scripts': [
            'my_robot_driver = my_package.my_robot_driver:main',
        ],
    },
)
This sets-up the package and adds in the data_files variable the newly added files: my_world.wbt, my_robot.urdf and robot_launch.py.
7 Test the code
From a terminal in your ROS2 workspace run:
colcon build
source install/local_setup.bash
ros2 launch my_package robot_launch.py
colcon build
call install\local_setup.bat
ros2 launch my_package robot_launch.py
This will launch the simulation. Webots will be automatically installed on the first run in case it was not already installed.
Note
If you want to install Webots manually, you can download it here.
Then, open a second terminal and send a command with:
ros2 topic pub /cmd_vel geometry_msgs/Twist "linear: { x: 0.1 }"
The robot is now moving forward.
At this point, the robot is able to blindly follow your motor commands. But it will eventually bump into the wall as you order it to move forwards.
To prevent this, let’s use the sensors of the robot to detect the obstacles and avoid them.
Close the Webots window, this should also shutdown your ROS nodes started from the launcher.
Close also the topic command with Ctrl+C in the second terminal.
8 Updating my_robot.urdf
You have to modify the URDF file in order to enable the sensors.
In my_robot.urdf replace the whole contents with:
<?xml version="1.0" ?>
<robot name="My robot">
    <webots>
        <device reference="ds0" type="DistanceSensor">
            <ros>
                <topicName>/left_sensor</topicName>
                <alwaysOn>true</alwaysOn>
            </ros>
        </device>
        <device reference="ds1" type="DistanceSensor">
            <ros>
                <topicName>/right_sensor</topicName>
                <alwaysOn>true</alwaysOn>
            </ros>
        </device>
        <plugin type="my_package.my_robot_driver.MyRobotDriver" />
    </webots>
</robot>
The ROS 2 interface will parse the <device> tags referring to the DistanceSensor nodes and use the standard parameters in the <ros> tags to enable the sensors and name their topics.
9 Creating a ROS node to avoid obstacles
The robot will use a standard ROS node to detect the wall and send motor commands to avoid it.
In the my_package/my_package/ folder, create a file named obstacle_avoider.py with this code:
import rclpy
from rclpy.node import Node
from sensor_msgs.msg import Range
from geometry_msgs.msg import Twist


MAX_RANGE = 0.15


class ObstacleAvoider(Node):
    def __init__(self):
        super().__init__('obstacle_avoider')

        self.__publisher = self.create_publisher(Twist, 'cmd_vel', 1)

        self.create_subscription(Range, 'left_sensor', self.__left_sensor_callback, 1)
        self.create_subscription(Range, 'right_sensor', self.__right_sensor_callback, 1)

    def __left_sensor_callback(self, message):
        self.__left_sensor_value = message.range

    def __right_sensor_callback(self, message):
        self.__right_sensor_value = message.range

        command_message = Twist()

        command_message.linear.x = 0.1

        if self.__left_sensor_value < 0.9 * MAX_RANGE or self.__right_sensor_value < 0.9 * MAX_RANGE:
            command_message.angular.z = -2.0

        self.__publisher.publish(command_message)


def main(args=None):
    rclpy.init(args=args)
    avoider = ObstacleAvoider()
    rclpy.spin(avoider)
    # Destroy the node explicitly
    # (optional - otherwise it will be done automatically
    # when the garbage collector destroys the node object)
    avoider.destroy_node()
    rclpy.shutdown()


if __name__ == '__main__':
    main()
This node will create a publisher for the command and subscribe to the sensors topics here:
self.__publisher = self.create_publisher(Twist, 'cmd_vel', 1)

self.create_subscription(Range, 'left_sensor', self.__left_sensor_callback, 1)
self.create_subscription(Range, 'right_sensor', self.__right_sensor_callback, 1)
When a measurement is received from the left sensor it will be copied to a member field:
def __left_sensor_callback(self, message):
    self.__left_sensor_value = message.range
Finally, a message will be sent to the /cmd_vel topic when a measurement from the right sensor is received.
The command_message will register at least a forward speed in linear.x in order to make the robot move when no obstacle is detected.
If any of the two sensors detect an obstacle, command_message will also register a rotational speed in angular.z in order to make the robot turn right.
def __right_sensor_callback(self, message):
    self.__right_sensor_value = message.range

    command_message = Twist()

    command_message.linear.x = 0.1

    if self.__left_sensor_value < 0.9 * MAX_RANGE or self.__right_sensor_value < 0.9 * MAX_RANGE:
        command_message.angular.z = -2.0

    self.__publisher.publish(command_message)
10 Updating setup.py and robot_launch.py
You have to modify these two other files to launch your new node.
Edit setup.py and replace 'console_scripts' with:
'console_scripts': [
    'my_robot_driver = my_package.my_robot_driver:main',
    'obstacle_avoider = my_package.obstacle_avoider:main'
],
This will add an entry point for the obstacle_avoider node.
Go to the file robot_launch.py and replace def generate_launch_description(): with:
def generate_launch_description():
    package_dir = get_package_share_directory('my_package')
    robot_description = pathlib.Path(os.path.join(package_dir, 'resource', 'my_robot.urdf')).read_text()

    webots = WebotsLauncher(
        world=os.path.join(package_dir, 'worlds', 'my_world.wbt')
    )

    my_robot_driver = Node(
        package='webots_ros2_driver',
        executable='driver',
        output='screen',
        parameters=[
            {'robot_description': robot_description},
        ]
    )

    obstacle_avoider = Node(
        package='my_package',
        executable='obstacle_avoider',
    )

    return LaunchDescription([
        webots,
        my_robot_driver,
        obstacle_avoider,
        launch.actions.RegisterEventHandler(
            event_handler=launch.event_handlers.OnProcessExit(
                target_action=webots,
                on_exit=[launch.actions.EmitEvent(event=launch.events.Shutdown())],
            )
        )
    ])
This will create an obstacle_avoider node that will be included in the LaunchDescription.
11 Test the obstacle avoidance code
As in task 7, launch the simulation from a terminal in your ROS 2 workspace:
colcon build
source install/local_setup.bash
ros2 launch my_package robot_launch.py
colcon build
call install\local_setup.bat
ros2 launch my_package robot_launch.py
Your robot should go forward and before hitting the wall it should turn clockwise.
You can press Ctrl+F10 in Webots or go to the View menu, Optional Rendering and Show DistanceSensor Rays to display the range of the distance sensors of the robot.

Summary
In this tutorial, you set-up a realistic robot simulation with Webots, implemented a Python plugin to control the motors of the robot, and implemented a ROS node using the sensors to avoid the obstacles.
Next steps
You might want to improve the plugin or create new nodes to change the behavior of the robot. Taking inspiration from these previous tutorials could be a starting point: